You have seen it on ChatGPT, Claude, Gemini, and every AI product launched in the last two years — text that appears word by word, character by character, as if the AI is thinking and typing in real time. It feels alive. It feels intelligent. And users love it.
The good news: you do not need an AI backend to build the effect. The streaming animation is entirely a front-end technique. Whether you are faking it for a demo or wiring it to a real AI API, the JavaScript is the same.
This tutorial covers four approaches, from simplest to most powerful:
- Pure CSS typewriter animation
- JavaScript character-by-character reveal
- Simulating streaming with
ReadableStream - Real streaming with
EventSource(Server-Sent Events)
How ChatGPT Streaming Actually Works
Before writing any code, it helps to understand what is actually happening under the hood.
When you send a message to ChatGPT, the server does not wait to generate the full response before sending it. Instead it uses chunked HTTP transfer — it streams small pieces of text (tokens) to the browser as they are generated, one at a time.
The browser receives these chunks via one of two mechanisms:
ReadableStream— part of the Fetch API, lets you read a response body incrementally as it arrivesEventSource(Server-Sent Events) — a browser API specifically designed for server-to-client streaming over HTTP
On the front end, your JavaScript reads each incoming chunk and appends it to the DOM — creating the typing effect. The blinking cursor is just a CSS animation on a <span>.
Method 1 — Pure CSS Typewriter (No JavaScript)
The simplest version. Best for hero sections, landing pages, or anywhere the text is fixed and known in advance.
<p class="typewriter">Building AI-powered apps with JavaScript.</p>.typewriter {
font-family: 'JetBrains Mono', monospace;
font-size: 1.2rem;
color: #f0f6ff;
/* Key: width animates from 0 to full */
width: 42ch;
white-space: nowrap;
overflow: hidden;
/* Typing animation */
animation: typing 2.5s steps(42, end) forwards;
/* Blinking cursor via border-right */
border-right: 2px solid #5b9cf6;
animation:
typing 2.5s steps(42, end) forwards,
blink 0.75s step-end infinite;
}
@keyframes typing {
from { width: 0 }
to { width: 42ch }
}
@keyframes blink {
0%, 100% { border-color: #5b9cf6 }
50% { border-color: transparent }
}
chunit —1chequals the width of the0character in the current font. Using42chfor a 42-character string gives a perfect match with monospace fonts.
Limitation: the text length must be known ahead of time and hardcoded into the CSS. For dynamic content, you need JavaScript.
Method 2 — JavaScript Character-by-Character Reveal
This is the core building block. A simple function that takes a string and reveals it one character at a time with a configurable delay.
<div id="output">
  <span id="text"></span>
  <span class="cursor">|</span>
</div>
.cursor {
display: inline-block;
color: #5b9cf6;
font-weight: 300;
animation: blink 0.7s step-end infinite;
margin-left: 1px;
}
@keyframes blink {
0%, 100% { opacity: 1 }
50% { opacity: 0 }
}/**
* Streams text character by character into a DOM element
* @param {HTMLElement} el - Target element
* @param {string} text - Full text to reveal
* @param {number} speed - Milliseconds per character (default 30ms)
*/
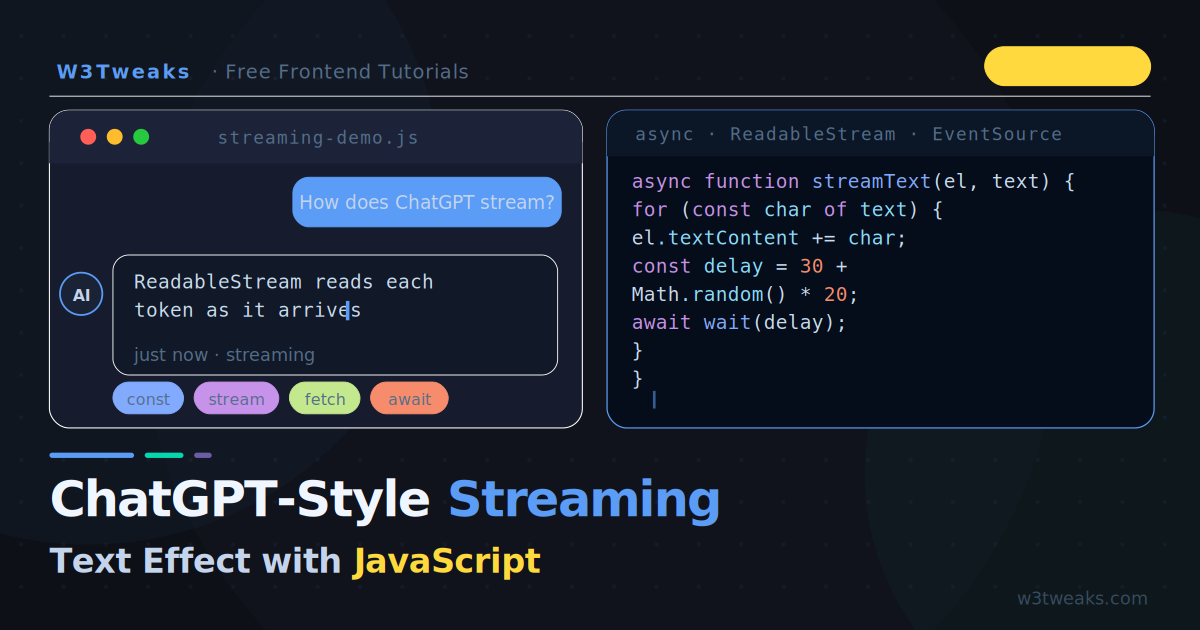
async function typeText(el, text, speed = 30) {
for (const char of text) {
el.textContent += char;
// Random variance makes it feel more natural
const delay = speed + Math.random() * 20 - 10;
await new Promise(resolve => setTimeout(resolve, delay));
}
}
// Usage
const textEl = document.getElementById('text');
const response = "JavaScript is one of the most versatile languages in the world. With it you can build websites, APIs, mobile apps, and now AI-powered experiences.";
typeText(textEl, response, 25);The Math.random() variance on the delay is the secret sauce — it makes the typing feel human and slightly uneven, just like the real ChatGPT.
Method 3 — Simulating Streaming with ReadableStream
This is the closest you can get to real AI streaming without a backend. You create a fake ReadableStream that emits words at intervals — perfect for demos, skeleton loaders, or testing your UI before connecting a real API.
/**
 * Creates a fake ReadableStream that emits words one at a time
 * Simulates how the OpenAI streaming API delivers tokens
 */
function createFakeStream(text, delayMs = 50) {
  const words = text.split(' ');
  let index = 0;

  return new ReadableStream({
    async pull(controller) {
      if (index < words.length) {
        // Emit the next word + a space (like real tokens)
        const chunk = words[index] + (index < words.length - 1 ? ' ' : '');
        controller.enqueue(new TextEncoder().encode(chunk));
        index++;

        // Simulate network delay between tokens
        await new Promise(r => setTimeout(r, delayMs + Math.random() * 30));
      } else {
        controller.close();
      }
    }
  });
}

/**
 * Reads a ReadableStream and renders chunks into the DOM
 */
async function renderStream(stream, outputEl) {
  const reader = stream.getReader();
  const decoder = new TextDecoder();

  try {
    while (true) {
      const { done, value } = await reader.read();
      if (done) break;

      // Decode the chunk and append to DOM
      const chunk = decoder.decode(value, { stream: true });
      outputEl.textContent += chunk;

      // Auto-scroll to bottom (important for chat UIs)
      outputEl.scrollTop = outputEl.scrollHeight;
    }
  } finally {
    reader.releaseLock();
  }
}

// Wire it together
const output = document.getElementById('text');
const message = "This is simulated streaming output. Each word arrives like a token from an AI API. You can connect this same renderStream function to a real fetch response and it will work identically.";

const fakeStream = createFakeStream(message, 60);
renderStream(fakeStream, output);
The beauty of this approach: renderStream is API-agnostic. When you swap the fake stream for a real fetch response body, zero code changes.
Method 4 — Real Streaming with the Fetch API
When you connect to a real streaming API (OpenAI, Anthropic, or your own backend), the fetch response body is itself a ReadableStream. You read it the same way.
async function streamFromAPI(prompt, outputEl) {
  // Show the cursor immediately
  const cursor = document.createElement('span');
  cursor.className = 'cursor';
  cursor.textContent = '|';
  outputEl.parentNode.appendChild(cursor);

  try {
    const response = await fetch('/api/stream', {
      method: 'POST',
      headers: { 'Content-Type': 'application/json' },
      body: JSON.stringify({ prompt })
    });

    if (!response.ok) throw new Error(`API error: ${response.status}`);
    if (!response.body) throw new Error('No response body');

    const reader = response.body.getReader();
    const decoder = new TextDecoder();

    while (true) {
      const { done, value } = await reader.read();
      if (done) break;

      // OpenAI streams as "data: {...}\n\n" — parse accordingly
      const raw = decoder.decode(value, { stream: true });
      const lines = raw.split('\n').filter(l => l.startsWith('data: '));

      for (const line of lines) {
        const data = line.replace('data: ', '').trim();
        if (data === '[DONE]') break;

        try {
          const json = JSON.parse(data);
          const token = json.choices?.[0]?.delta?.content ?? '';
          if (token) outputEl.textContent += token;
        } catch {
          // Skip malformed chunks
        }
      }
    }

  } catch (err) {
    outputEl.textContent += `\n\n[Error: ${err.message}]`;
  } finally {
    // Remove cursor when done
    cursor.remove();
  }
}
OpenAI’s streaming format: Each chunk arrives as
data: {"choices":[{"delta":{"content":"token"}}]}\n\n. The[DONE]sentinel signals end of stream. Anthropic and other providers use similar but slightly different formats — check their docs.
Method 5 — Server-Sent Events (EventSource)
If your backend uses Server-Sent Events instead of chunked fetch, use the EventSource API. It handles reconnection, event IDs, and named event types automatically.
function streamFromSSE(url, outputEl) {
  const source = new EventSource(url);

  source.addEventListener('message', (event) => {
    if (event.data === '[DONE]') {
      source.close();
      return;
    }

    try {
      const { token } = JSON.parse(event.data);
      outputEl.textContent += token;
    } catch {
      outputEl.textContent += event.data;
    }
  });

  source.addEventListener('error', () => {
    source.close();
    outputEl.textContent += '\n[Connection closed]';
  });

  // Return the source so the caller can close it if needed
  return source;
}

// Usage
const output = document.getElementById('text');
const stream = streamFromSSE('/api/sse-stream?prompt=Hello', output);
Putting It All Together — Full Chat UI
Here is a complete, self-contained chat interface with streaming:
<!DOCTYPE html>
<html lang="en">
<head>
  <meta charset="UTF-8">
  <title>Streaming Chat UI</title>
  <style>
    * { box-sizing: border-box; margin: 0; padding: 0 }
    body {
      background: #0d1117;
      color: #c4d4ed;
      font-family: 'Plus Jakarta Sans', sans-serif;
      display: flex;
      flex-direction: column;
      height: 100vh;
    }

    .chat-window {
      flex: 1;
      overflow-y: auto;
      padding: 24px 20px;
      display: flex;
      flex-direction: column;
      gap: 16px;
      max-width: 720px;
      margin: 0 auto;
      width: 100%;
    }

    .message {
      padding: 14px 18px;
      border-radius: 12px;
      font-size: 15px;
      line-height: 1.7;
      max-width: 85%;
    }
    .message.user {
      background: rgba(91,156,246,.15);
      border: 1px solid rgba(91,156,246,.25);
      align-self: flex-end;
      color: #e0ecff;
    }
    .message.ai {
      background: #161c2d;
      border: 1px solid rgba(255,255,255,.08);
      align-self: flex-start;
      color: #c4d4ed;
    }

    .cursor {
      display: inline-block;
      width: 2px;
      height: 1em;
      background: #5b9cf6;
      margin-left: 2px;
      vertical-align: text-bottom;
      animation: blink 0.7s step-end infinite;
    }
    @keyframes blink {
      0%,100% { opacity: 1 }
      50%      { opacity: 0 }
    }

    .input-bar {
      border-top: 1px solid rgba(255,255,255,.08);
      padding: 16px 20px;
      display: flex;
      gap: 10px;
      max-width: 720px;
      margin: 0 auto;
      width: 100%;
    }
    .input-bar input {
      flex: 1;
      background: #161c2d;
      border: 1px solid rgba(255,255,255,.1);
      border-radius: 10px;
      padding: 12px 16px;
      font-size: 15px;
      color: #f0f6ff;
      outline: none;
      font-family: inherit;
    }
    .input-bar input:focus {
      border-color: rgba(91,156,246,.5);
      box-shadow: 0 0 0 3px rgba(91,156,246,.1);
    }
    .input-bar button {
      background: linear-gradient(135deg, #5b9cf6, #06d6b0);
      border: none;
      border-radius: 10px;
      padding: 12px 20px;
      color: #fff;
      font-size: 14px;
      font-weight: 700;
      cursor: pointer;
      font-family: inherit;
      transition: opacity .18s;
    }
    .input-bar button:hover { opacity: .88 }
    .input-bar button:disabled { opacity: .4; cursor: not-allowed }
  </style>
</head>
<body>

<div class="chat-window" id="chatWindow"></div>

<div class="input-bar">
  <input id="userInput" placeholder="Ask me anything…" autocomplete="off">
  <button id="sendBtn">Send</button>
</div>

<script>
  const chatWindow = document.getElementById('chatWindow');
  const userInput  = document.getElementById('userInput');
  const sendBtn    = document.getElementById('sendBtn');

  // Fake AI responses for demo — replace with real API call
  const RESPONSES = [
    "JavaScript functions are reusable blocks of code that accept inputs and return outputs. They are first-class objects, meaning you can assign them to variables, pass them as arguments, and return them from other functions.",
    "CSS Grid is a two-dimensional layout system. Use it when you need control over both rows and columns simultaneously. Flexbox is one-dimensional and better for laying out items in a single row or column.",
    "A ReadableStream is a web API that lets you read a stream of data incrementally. It is perfect for handling large responses, file uploads, or AI token streaming without waiting for the full payload.",
  ];

  let responseIndex = 0;

  function addMessage(text, role) {
    const div = document.createElement('div');
    div.className = `message ${role}`;
    div.textContent = text;
    chatWindow.appendChild(div);
    chatWindow.scrollTop = chatWindow.scrollHeight;
    return div;
  }

  async function streamResponse(text, el) {
    // Add blinking cursor
    const cursor = document.createElement('span');
    cursor.className = 'cursor';
    el.appendChild(cursor);

    const words = text.split(' ');
    for (let i = 0; i < words.length; i++) {
      const word = words[i] + (i < words.length - 1 ? ' ' : '');
      // Insert word before cursor
      cursor.insertAdjacentText('beforebegin', word);
      chatWindow.scrollTop = chatWindow.scrollHeight;
      await new Promise(r => setTimeout(r, 40 + Math.random() * 30));
    }

    // Remove cursor when done
    cursor.remove();
  }

  async function handleSend() {
    const message = userInput.value.trim();
    if (!message) return;

    // Disable input during streaming
    sendBtn.disabled = true;
    userInput.value = '';

    // Add user message
    addMessage(message, 'user');

    // Add empty AI message
    const aiMsg = addMessage('', 'ai');

    // Stream the response
    const response = RESPONSES[responseIndex % RESPONSES.length];
    responseIndex++;
    await streamResponse(response, aiMsg);

    sendBtn.disabled = false;
    userInput.focus();
  }

  sendBtn.addEventListener('click', handleSend);
  userInput.addEventListener('keydown', e => {
    if (e.key === 'Enter' && !e.shiftKey) {
      e.preventDefault();
      handleSend();
    }
  });
</script>
</body>
</html>
Copy that into an .html file and open it in your browser — you get a fully working streaming chat UI with no dependencies.
Connecting to the Real OpenAI API
To replace the fake responses with real AI output, swap streamResponse for a fetch call to your backend:
async function askAI(prompt, outputEl) {
  const res = await fetch('https://api.openai.com/v1/chat/completions', {
    method: 'POST',
    headers: {
      'Content-Type': 'application/json',
      'Authorization': `Bearer ${YOUR_API_KEY}`
    },
    body: JSON.stringify({
      model: 'gpt-4o-mini',
      stream: true,           // ← this enables streaming
      messages: [{ role: 'user', content: prompt }]
    })
  });

  const reader = res.body.getReader();
  const decoder = new TextDecoder();

  while (true) {
    const { done, value } = await reader.read();
    if (done) break;

    const lines = decoder.decode(value).split('\n').filter(Boolean);
    for (const line of lines) {
      if (!line.startsWith('data:')) continue;
      const data = line.slice(5).trim();
      if (data === '[DONE]') return;

      const token = JSON.parse(data).choices[0].delta.content ?? '';
      outputEl.textContent += token;
    }
  }
}
Never expose your API key in front-end code. Always route requests through a server-side proxy or use a serverless function (Cloudflare Workers, Vercel Edge Functions, Netlify Functions) that holds the key securely.
Performance Tips
Use insertAdjacentText not innerHTML — it is faster and prevents XSS injection from streamed content.
Throttle DOM updates — for very fast streams, batch multiple tokens into a single DOM update using requestAnimationFrame:
let buffer = '';
let rafId = null;

function flushBuffer(el) {
  if (buffer) {
    el.textContent += buffer;
    buffer = '';
  }
  rafId = null;
}

function appendToken(token, el) {
  buffer += token;
  if (!rafId) rafId = requestAnimationFrame(() => flushBuffer(el));
}
Auto-scroll carefully — only scroll to the bottom if the user has not manually scrolled up. Track scroll position and skip auto-scroll if they have.
Live Demo
Tab 3 shows a full chat UI. Tab 4 lets you compare streaming speeds side by side.
Key Takeaways
- The ChatGPT streaming effect is a front-end animation, not a back-end feature
ReadableStream+ the Fetch API handle real token streaming natively — no libraries needed- Add
Math.random()variance to delays to make typing feel natural - Use
EventSourcewhen your backend uses Server-Sent Events - Always proxy API keys through a backend — never expose them in browser JavaScript
requestAnimationFramebatching keeps the UI smooth at high token speeds
The full demo HTML in Method 4 above is copy-paste ready and works in every modern browser. Open it locally, then swap the fake responses for a real API call when you are ready.